Bob Dylan said that the times are a-changin’. He probably wasn’t talking about home studios, but his lines ring true in that department. It used to be that only big music production companies could afford the locations and equipment required to create a studio. But now, with a little know-how, anyone with a spare room can set one up and enjoy high-quality output.
So the first thing you need to do is believe. And don’t stop believing–that you can create a home studio without having to save up for decades. The entire thing can be done without an onerous amount of planning and research. But you need to do it the right way and we’re here to show you how.
Where to Setup a Home Studio
Just like in real estate, when it comes to home studios, it’s all about location, location, location. In most homes you probably won’t have that many rooms to choose from. If you have one spare room, then go with that. If you have a few options, then use the following guidelines to decide which one to go with. You could also use these as pointers on how to set up the space.
Choose a Quiet Room
For obvious reasons. You don’t want the sound of blaring horns or your neighbor’s children screeching in the background of your recordings. So choose a room that faces away from the street if you live on a noisy one and away from neighboring homes as much as possible.
It’s also important to remember that you will become a source of noise to whoever is around you. You don’t want to disrupt others’ lives if you decide to be like the kid in the Michael Jackson video and turn it all the way up to “Are you nuts?!” So for that reason, too, pick a room that’s away from neighbors, home offices, rooms used by older folks, and the like.
Soundproofing a Home Studio
The first thing that you need to understand is that soundproofing is not the same as acoustic treatment. The former is the process of setting up a room so that noises from the outside don’t seep in and vice versa. Basically, you want the sounds that are created in the studio to remain in the studio.
Since we’re dealing with a home studio, let’s talk about some simple ways to soundproof a room. One easy way to do it is by loading material around the boundaries of your room. This could be as simple as covering your windows and doors with something like a thick blanket, as this helps trap the sound and reduce echo. You can also, with some DIY, put ridged foam on the wall to help better trap and neutralize echo and stop reverberations messing with audio.
Acoustic Treatment of a Home Studio
Unlike soundproofing, acoustic treatment is the practice of setting up a room so that the sounds produced within remain of a high fidelity. So you’re trying not to let the sound reflect too much, which leads to it losing quality.
Luckily for us home studio folk, acoustic treatment has become easier with new products that make it easy to do with a quick installation. The Auralex Pro Plus, for example, is an acoustic treatment package that comes with all the bass panels and acoustic traps required for a good acoustic treatment of a room. All you need to do is follow the instructions and get these elements up on the walls of your room to prevent sound reflections.
Choose a Room With the Right Flooring
When it comes to creating a home studio, you want to avoid carpeting as much as possible. There are a couple of reasons for that. Firstly, carpets tend to absorb frequencies at the high end easily and bass frequencies less easily.
Ideally, your studio would have tile or concrete flooring. These don’t need maintenance and don’t mess with sound too much. This doesn’t mean you can’t have a carpet in a home studio, but it’s certainly less than ideal.
Clear out the Room
Once you’ve picked a room, rid it of everything that isn’t going to go in the studio itself. Start from scratch and add whatever elements are required for soundproofing or acoustic treatment. Everything else needs to go.
Now we know two important things. The first is how to pick a room that’s as close to ideal as possible for a home studio. The second is how to set the room up so that there isn’t a lot of sound reflection or noise coming through.
So, how do you set up your newly cleaned out room?
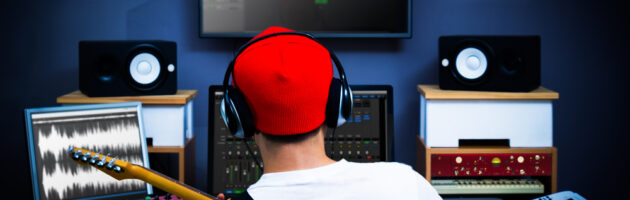
Components of a Home Recording Studio
There’s some paraphernalia that all home recording studios just need to have. The exact brands that you choose will vary depending on your budget. We will give you a few options in our list below. But the main thing to understand is why each of these elements is important in a home studio and how to string them together so they work together in harmony.
Computer
The modern home recording studio is a digital den. Everything that you say will be translated into bits and bytes and needs to be manipulated in that form. So it is imperative that you have a computer that can handle audio recording.
The good thing is that most computers these days can do that job. Any laptop that you can find on the market will be able to run a recording software and monitor input. You don’t need to obsess too much over whether you choose a Mac or a Windows computer, but note they’ll use different software. When it comes to Macs, the Macbook Pro is the classic choice. The Dell Inspiron is a popular choice among Windows users.
Here are a few things that you do need to take into consideration:
Noise
Given what you’re going to use the computer for, you absolutely don’t want one that’s noisy–whether that’s noise from the keyboard or the hard drive or the internal fan. Read multiple reviews to find out how loud a computer is. Choosing one that has a solid state drive will make things a lot quieter.
Screen Size
Anyone who’s used recording software knows that working with multiple tracks is a lot easier on a computer with a large screen. So pick a computer with a large screen as much as possible. You might want to go with a desktop for this reason.
Ports
You may run into situations where you will need multiple ports. So either pick a computer that has several ports or use a port multiplier like this one by Quantum. They’re cheap and easy to use.
Backlit Keys
You might have to work in lower-light situations at times so pick a computer with keys that have backlights. That’s most computers these days so this shouldn’t be hard to find.
Audio Interface
The audio interface is a piece of equipment that acts as a middleman between your analog components (like a microphone) and your computer. That means that you won’t need an audio interface if you make all of your music using computer samples or input using something that connects directly to your computer. High-quality USB microphones exist, and if you’re only doing vocal work you may not need an interface at all.
But if you use good condenser microphones, they won’t slot into a USB port. So you’ll need an audio interface to manage that interaction. The audio interfaces from PreSonus and Focusrite are known to do a great job on a budget.
Digital Audio Workstation
We’ve used the term ‘audio recording software’ a few times in this article so far. But the technical term for that is Digital Audio Workstation (DAW). This is the software into which you will record all your tracks and then mix and master your songs or podcast.
There are both free and paid DAWs out there. Audacity is by far the most popular free DAW out there. It is more than capable of handling basic audio recording requirements. Considering that this is also the DAW with the largest community and volume of learning materials around it, Audacity should be your choice if you don’t want to pay for a DAW.
But it is worth investing in a DAW as soon as you can. A feature-rich DAW will give you a lot more versatility when it comes to manipulating audio. The Presonus Studio One, FL Studio, and Ableton are some popular paid DAWs.
Another thing to note is that when you purchase an audio interface, it usually comes bundled with a DAW. For example, if you buy an audio interface by PreSonus, you’ll get a copy of their DAW which you can register for a single user. So if you do buy an audio interface like we recommended in the last step, then you will get a high-quality DAW with it and won’t have to spend any extra money.
Headphones
Before we talk about any components that input sound, we need to talk about output. And since we’re talking about home recording studios, we’ll start with headphones. They’re cheap and so very portable.
You can’t just use any old headphones if you want a good quality of sound. For tracking input, you need a good pair of closed-back headphones like the Shure SRH840. Open-back headphones are used for mixing since they emphasize high-quality sound over isolation. The Audio-Technica ATH-AD700X is a great open-back headphone.
Now since we’re talking about home studios, we don’t really need to think about studio monitors. But if you decide to fancy up the joint a little bit, then you can use studio monitors to track output. The KRK Rokit 5 G3 is a popular choice among home studio enthusiasts.
That said, you don’t really need studio monitors to do basic records. You can track audio well enough using good headphones and a keen ear.
Microphones & Microphone Stands
You’ll most likely end up with a studio that has many different types and brands of microphones. But to start off, you need a good condenser mic to record vocals.
The Rode NT1A is a great large diaphragm condenser mic. If you want a small diaphragm mic to record things like drums and other percussion instruments, the AKG P170 is a great bet.
If you have mic stands, you’re going to need mic stands. And just any flimsy old mic stand won’t do. You’ll need one that can be easy to adjust and won’t wear away when you do adjust it. The DR Pro Boom is a good choice for beginners.
XLR Cables
Where there are mics, there are XLR cables. The length of XLR cables you choose will depend on the size of your studio. They can be 6ft long or 25ft long depending on the area that you need them to cover. These XLR cables from Mogami are a must-have for any home recording studio.
Pop Filter
Mics can record audio on their own but they don’t always do it the right way. They have a tendency to produce a boomy output when you pronounce your P’s and B’s. The way to prevent that is by using a pop filter. They’re very cheap and can instantly elevate your recordings. Many microphones come with one included.
The Stedman Proscreen XL is a good pop filter option but really there isn’t a huge difference between products in this category.
Final Thoughts
As you can see, we haven’t covered guitars, keyboards, or any other specific musical instruments. That’s because if you do play these and you have a good audio interface, then they can easily slot into the right home recording studio setup.
What we have covered are the absolute essentials for any home recording studio. You also know how to choose a space that is ideal for such a requirement. So when you do finally hit record, you can do so knowing that you’re doing it the right way.